Main
Menu
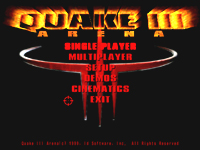
This
is the root menu that you get when you first start the Quake III: Arena
program. From here you have several options.
-
Single
Player: The Single Player menu option will take you to the screen where
you set up a single player game of Quake III: Arena. From here you can
fight against bots in either Skirmish or Tournament mode.
-
Multiplayer:
The Multiplayer menu option will take you to the Multiplayer setup screen
where you can search for multiplayer games to join or even create one of
your own.
-
Setup:
The Setup option will take you to the Setup screen, where you can do lots
of important things like customize your controls, choosing your player
characteristics, and others. See below for more information.
-
Demo:
The Demo option will take you to a list of recorded demos that you can
replay for you own viewing enjoyment. Don't forget the popcorn!
-
Cinematics:
Here you can review the various cinematic sequences you unlock through
the single player tournament mode. Note that you can only view cinematics
that you've unlocked by progressing to that point in the single player
tournament.
-
Exit:
The Exit option will, after you confirm your selection, close Quake III:
Arena and take you back to the desktop.
Setup
Menu
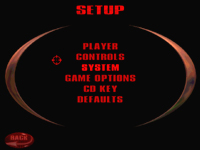
The
setup menu, accessible by clicking on "Setup" in the Main menu, allows
you to change a lot of important settings, such as your player characteristics,
controls, system settings, graphics settings, and game options. Each of
the choices is described below.
Player
The
player menu allows you to specify several characteristics about your game
character. Here's the choices you'll have:
-
Choose
a name by clicking on "Name" and typing in your handle.
-
Choose
a model by clicking on "Model" button in the lower right-hand corner, then
scrolling through the choices and picking one that looks good - all models
are identical in terms of abilities.
-
You can
also customize your Railgun colors by clicking on the "Effects" option.
-
Finally,
adjusting your handicap with the "Handicap" option allows you to make the
game more difficult by choosing a value less than 100 - the lower the handicap,
the tougher you'll make it on yourself.
Controls
The
Controls menu allows you to customize your controls and game interface.
You'll probably want to spend a bit of time here to get things just right.
Your options are discussed below:
-
The Look
sub-menu will let you customize things like mouse speed, how you look up
and down (i.e., using mouse look), and what key your zoom button is assigned
to.
-
The Move
sub-menu allows you to assign keys to movement, as well as toggling whether
your character always runs when moving, and how to crouch.
-
The Shoot
sub-menu lets you assign keys or mouse buttons to attacks and switching
weapons.
-
The Misc.
sub-menu lets you fiddle with the other vairous commands, such as showing
scores, using items, gesturing, and chatting.
System
The
System menu lets you tweak some of your system settings to enhance performance
and your game experience. It contains several sub-menus.
-
The Graphics
sub-menu lets you tweak your graphics settings, such as drivers, lighting,
and detail settings.
-
The Display
sub-menu lets you set your brightness and screen size
-
The Sound
sub-menu lets you tweak your sound settings
-
The Network
sub-menu lets you adjust your data transfer rates.
Game
Options
The
Game Options menu allows you to adjust several game settings. They are
all essentially self-explanatory.
CD
Key
The
CD Key menu allows you to input your CD key.
Defaults
Selecting
the defaults menu will revert all your settings back to the manufacturer
defaults. Be careful and make sure this is really what you want!
This
page is Copyright © 1998-2000 by QBitch hosted by Quake3
Arena.com All information by Planetquake.com
Images by ID Software.
All Rights Reserved.