|
Step 1: First we will deal with the basic mass of the body. Go to primitives and create a box with the proportions L3xW3xH4 in the top view port.
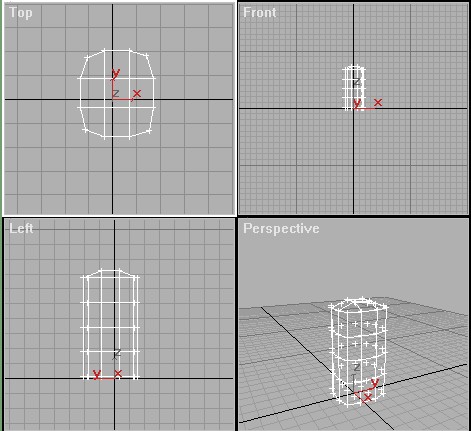
Fig 1Step 2:Next select the box and go to modify object and then edit mesh at the vertex level . Now in the top viewport select the center 4 vertexes at the top of the box, once selected move them up slightly on the y. Next select all of the corner vertexes in the top view port and move them towards the center. You should now have something like fig 1
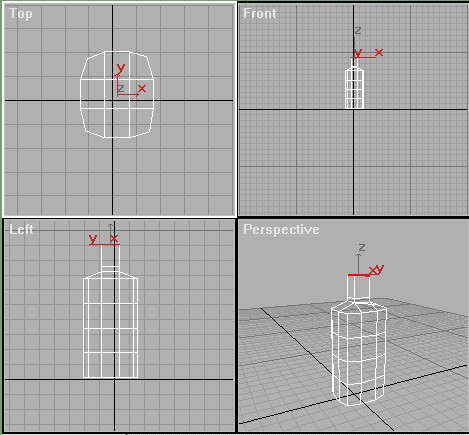
Fig 2Step 3:Next select the box and go to modify object/ edit mesh at the Face sub-object level. Most of the work will be done at this level. In the top viewport select the center poly (fig 1). It should now be red, This poly will now be extruded to form the neck and the head. Now go to extrude and use the spinner to extrude the poly out from the body to form the neck and extrude again to form the head . You should now have something that resembles fig .2 . To make the face of the character extrude the poly where the face should be.
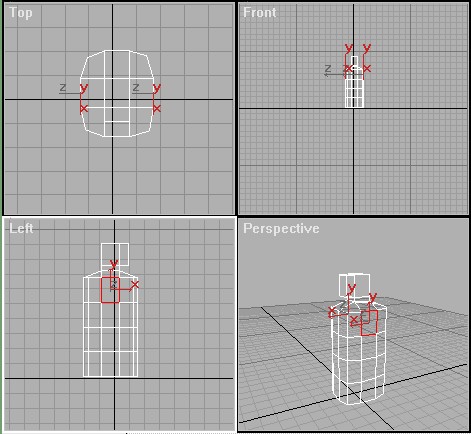
Fig 3Step 4: Onto the Limbs of the character then. By now you should be able to see the very rough form of the character with a head and a body. Next select the polys where the arms will be extruded from (fig 3). From here you will make 3 extrusions one to the elbow then to the wrist and finally to the end of the hand fig 4 .
Fig 4
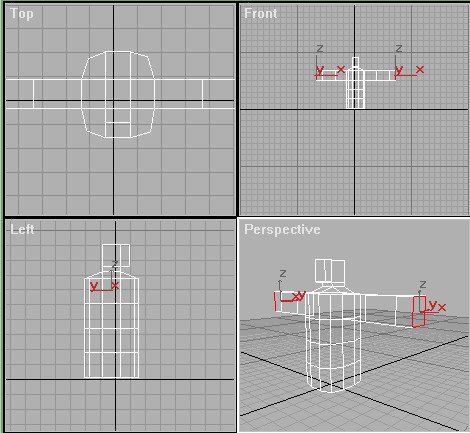
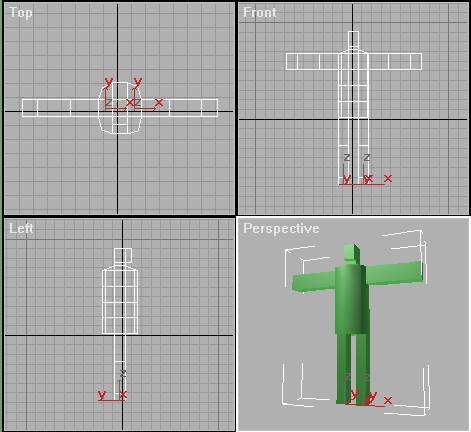
Fig 5Step 4: Ok then onto the legs then. By now you should have a good idea of how to extrude the faces . So to form the legs you basically do the same as the arms but select the 2 outer polys at the bottom of the box, and once again 3 extrusion , 1 to the knee and then to the ankle and then to the bottom of the foot.
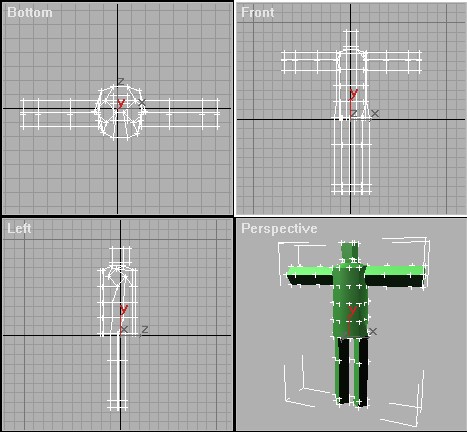
Fig 6Step 5: Next we need to take the vertexes the comprise the arms and legs and rotate them so edges of the limbs are facing towards the front of the character. This step is applied for texture mapping reasons that we will go through later. Your model should now look like fig. 6.
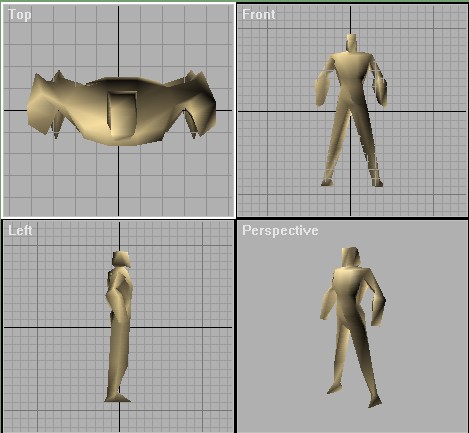
Fig 7Step 6: Ok now you should have something that resembles a robot out of Dr Who..J .Time to make it look more ..um..human. So next select all of the faces of your character and make them all smoothing group 1 . Now it should like slightly smoother but still not human , so from here you need to select the object and go to edit mesh at the vertex level and start pulling vertexes into the right places so it looks like a human form. Fig 7 And that's it you should now have a low poly human , keep in mind that this model can easily be reduced to well under 200 polys, it all depends on the box you start with.
You can download the finished mesh here.