| Quake2 Mission Pack 1: The Reckoning |
|
Now, on with the show...
Single-Player Levels
First Unit
- The Swamps serve as your introduction into the world of The Reckoning. Excellent outdoor areas both architecturally and texturally; they look and feel real, while keeping the running speeds high. Good use of "natural" features (rocks and rubble) to accentuate the outdoorsy feel. Semi-linear flow throughout, which rewards the explorer, and due to the similarities of some of the indoor cave areas, remembering where you are can be difficult. No mechanical goals at all in this level -- simply find your way into the...
 Sewers. This level sports an extremely well-thought-out flow, as it is linear without making you feel
like you're being led by the nose. Excellent thematic detail, despite the relatively low brush count. Running
speeds are high, and the layout is intricate and somewhat claustrophobic (low ceilings, dark areas). What
struck me was the consistent use of "detail" architecture, such as doors and piping -- everything
looks as though it was built by the same hand, immersing the player even more. I loved the look of the
"flayed wall" after I found the secret, too; blown-up walls should look like this.
Sewers. This level sports an extremely well-thought-out flow, as it is linear without making you feel
like you're being led by the nose. Excellent thematic detail, despite the relatively low brush count. Running
speeds are high, and the layout is intricate and somewhat claustrophobic (low ceilings, dark areas). What
struck me was the consistent use of "detail" architecture, such as doors and piping -- everything
looks as though it was built by the same hand, immersing the player even more. I loved the look of the
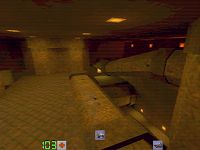
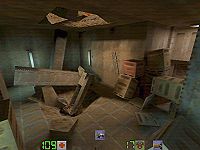
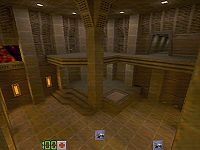
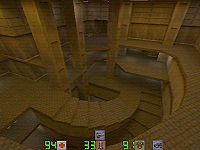
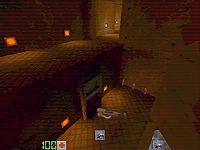
"flayed wall" after I found the secret, too; blown-up walls should look like this.- Waste Sieve is the final unique level in this first unit. You'll find yourself going even further into the depths of the sewage treatment plant. It gets even darker and more claustrophobic, and sometimes a bit challenging to even proceed; the level winds in and through itself, giving you complex play areas (screen shot). This makes sense, though, because you're really not supposed to be where you are, and thus there is no clear path for you to follow. Excellent explorer-type secrets (my favorites), with plenty of stuff to climb on and jump up to.
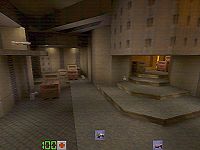
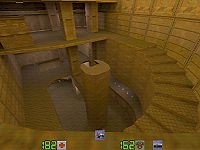
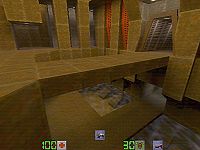
 Outer Compound has you entering a unit with the objective of shutting off the Strogg power supply. This
level is most excellently done, featuring smooth running speeds and interesting thematic architecture. It
also features your first encounter with the rest of your strike team (screen shot); evidently, they can't
pilot the pods as well as you can. The ornamentation and brush structures throughout this level are simple
for the most part, with texturing carrying the weight (and carrying it well, I might add). Some complex
secrets are to be found here, along with a wonderful circularity; there isn't a lot of backtracking required.
Outer Compound has you entering a unit with the objective of shutting off the Strogg power supply. This
level is most excellently done, featuring smooth running speeds and interesting thematic architecture. It
also features your first encounter with the rest of your strike team (screen shot); evidently, they can't
pilot the pods as well as you can. The ornamentation and brush structures throughout this level are simple
for the most part, with texturing carrying the weight (and carrying it well, I might add). Some complex
secrets are to be found here, along with a wonderful circularity; there isn't a lot of backtracking required.- Inner Compound seamlessly continues the theme begun in the Outer Compound, and sports a very nice blending of outdoor and indoor areas. It also features a secret that is very difficult to find and get to, which is all the more rewarding when you find it. Good use of specials to enhance the play experience; the three-way laser thing was very cool. This level is linear, but it doesn't feel like it due to all the exploring you'll be doing. The combat difficulty rises sharply in this level due to the introduction of one of the modified monsters.
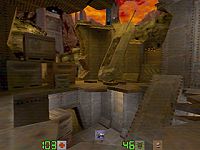
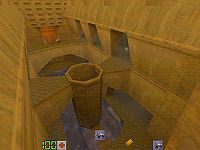
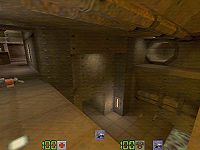
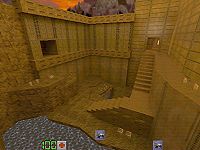
 Core Reactor is where you'll find the power cubes you'll need (one is shown in the shot to the right)
to get out of the Inner Compound. The running speeds were a bit slow in some spots due to this level's
construction; you'll be exploring along the upper and lower levels of an outside "ring", which is
liberally stocked with crates and overhead piping, giving this level a true "reactor" feel. Some
side areas are present (one of which is in the shot to the right) and the functioning machinery gives it
life. Indeed, shutting down the machinery by removing the cubes is one of the cooler effects in this level.
Combat is difficult due to the constricted areas, and the author has cleverly used monsters that use direct-hit
weapons; you'll work hard for your kills here. It's fun to prowl around the level after you've killed everything
and scrounge for the abundance of ammo that is present here. Get as much as you can hold, because you'll need it.
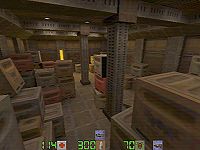
Core Reactor is where you'll find the power cubes you'll need (one is shown in the shot to the right)
to get out of the Inner Compound. The running speeds were a bit slow in some spots due to this level's
construction; you'll be exploring along the upper and lower levels of an outside "ring", which is
liberally stocked with crates and overhead piping, giving this level a true "reactor" feel. Some
side areas are present (one of which is in the shot to the right) and the functioning machinery gives it
life. Indeed, shutting down the machinery by removing the cubes is one of the cooler effects in this level.
Combat is difficult due to the constricted areas, and the author has cleverly used monsters that use direct-hit
weapons; you'll work hard for your kills here. It's fun to prowl around the level after you've killed everything
and scrounge for the abundance of ammo that is present here. Get as much as you can hold, because you'll need it.- The Warehouse is next on your list, and contains quite a few thinking/observation type secrets; that is, you can often see the item in the secret, but you'll need to figure out how to get there. More of the quality architecture that's become the norm, along with an excellent adherence to theme. There is some slowing in spots, but nothing unmanageable and never at critical times. Again, this level features consistent structural and architectural details (doors, terminals, and the like). Some puzzles in this one, too. I especially liked the route you take to exit this level, since you can see the exit route throughout your wanderings in this level.
- Intelligence Center is the final unique level in this unit. The secondary goal at the start of the level is absolutely perfect, and completing it is just too cool. The architecture in this one is surprisingly bland, but as it consists of mostly hallways, it's not unexpected; nevertheless, it is consistent and feels real. Another modified monster makes his appearance here; better have a quad by now, because you'll wish you did if you don't. Some very good combat in this level, along with both a two-part secret as well as a secret that you can't reach by conventional means.
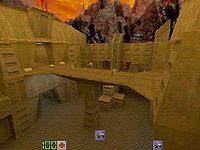
- Industrial Facility features some rather large architecture, yet the running speeds stay high. This level really makes the player feel small, as if these structures were made for titans. It's big both inside and out, giving you a lot of running room in combat. This one's the "hub" for this unit, as you'll see it three times.
 Outer Base
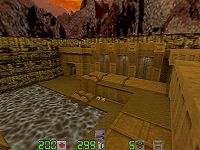
is the next in line. The secondary goal is a bit too specific, but this one features some great wrecked
architecture (screen shot) and secrets that require you to be clever and observant. The architecture is a bit
on the bland side, brush-wise, but the textures carry some of the load admirably, and the level as a whole runs
very smoothly.
Outer Base
is the next in line. The secondary goal is a bit too specific, but this one features some great wrecked
architecture (screen shot) and secrets that require you to be clever and observant. The architecture is a bit
on the bland side, brush-wise, but the textures carry some of the load admirably, and the level as a whole runs
very smoothly.- Refinery has an excellent secondary objective and a very good theme. This one's play areas vary widely in size, and there is plenty of stuff to jump on, climb around, and swim through; it's an explorer's heaven. The best part about all this jumping and climbing around are the secrets you'll find along the way. One really interesting thing was watching what happens after you retrieve the airstrike marker (not found in this level); if you stand by the door leading out from the airstrike marker area (on the side of the ledge) you get to watch the fireworks... and they're really well done. In fact, I'd save the game before you put the marker back so you can watch it as many times as you want (I watched it five times, for the record). The plot twist that happens here is as interesting as it is unexpected.
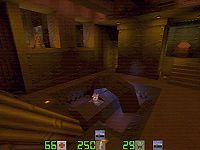
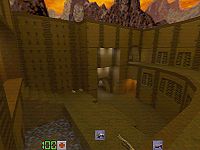
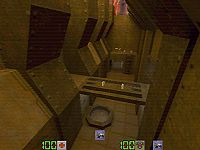
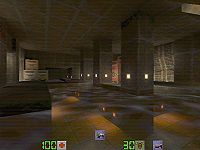
 Water Treatment Plant is another enormous level; however, this one does slow in places due to its size
and all of the water. Excellent indoor and outdoor architecture (screen shot) comprise this level, and the
adherence to theme -- and logical location of areas and items -- is superb. Seven secrets in here, so keep your
eyes peeled; I went back through it three times and only found five. Some of the secrets are intricate and
complex, and you can climb just about everywhere in here as well. Takes a very close second to the Refinery for
my favorite level in this unit; being able to play them back to back was incredibly fun and immersive.
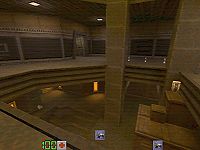
Water Treatment Plant is another enormous level; however, this one does slow in places due to its size
and all of the water. Excellent indoor and outdoor architecture (screen shot) comprise this level, and the
adherence to theme -- and logical location of areas and items -- is superb. Seven secrets in here, so keep your
eyes peeled; I went back through it three times and only found five. Some of the secrets are intricate and
complex, and you can climb just about everywhere in here as well. Takes a very close second to the Refinery for
my favorite level in this unit; being able to play them back to back was incredibly fun and immersive.- Badlands is where you'll find the airstrike marker, in a somewhat-unusual location. More of the excellent outdoor architecture and texturing is seen throughout this level, with the monster count being appreciably higher than before. Secrets are well-hidden yet logical in their placement; when you find one, you'll think, "of course!" The tension in this level is fairly high; the monsters make noise pretty much all throughout the level, so it can be hard to pinpoint exactly when you'll be attacked. Good use of specials here both to advance the plot as well as to expose the item you're looking for, though it's subtle; keep your eyes open after the earthquake.
 Lower Hangars features an excellent "heavy metal" storage-area feel. The architecture is
fitting and proportional as well as fast-running. The combat difficult rises markedly in this level, so be sure
to save your rockets and slugs for this level; you'll be glad you did, as this level has some of the more
effective monster placement and selection. This level contains a bounty of storage crates and staging areas,
making it fun to (again) jump and climb all over the place looking for secrets (five).
Lower Hangars features an excellent "heavy metal" storage-area feel. The architecture is
fitting and proportional as well as fast-running. The combat difficult rises markedly in this level, so be sure
to save your rockets and slugs for this level; you'll be glad you did, as this level has some of the more
effective monster placement and selection. This level contains a bounty of storage crates and staging areas,
making it fun to (again) jump and climb all over the place looking for secrets (five).- The Hangars contains, as usual, excellent architecture and texturing. The running speeds through most of this level could best be described as "erratic" due, no doubt, to the conveyor-belt mechanism which forms the backbone and the backdrop of this level -- plenty of moving entities and rotating brushes and the like. This level feels the most "alive" of any of them; it truly feels like you've stumbled into a working (and actively populated) Strogg area. More puzzles in this one, and a rather clever means of escape; not only is it well done, but it makes sense with the theme and your primary objective. I didn't particularly care for the 100-point beating I took after exiting the level (passing through the security lasers), however.
- Strogg Freighter has an excellent transition from the previous level; in fact, the liftoff sequence is almost too cool for words. This one's a low-gravity level, aboard the Strogg freighter which is taking you (all unwittingly) to your final destination, and features the first appearance of the beta gladiators. For the record, I hate these things, but thankfully i had two traps by that point, which made things a bit easier. Delicious, too, I might add. The architecture, lighting, and texturing were simply thematically perfect -- everything looked like it belonged, and it all fit well into a cohesive whole. The endgame was challenging in that you have a timed puzzle to decipher (and no, you're not supposed to blow up the ship -- you're stowed away because you want it to arrive, remember?)
- Cargo Bay is where you disembark your hijacked freighter. This level features consistent structures with "The Hangars," giving a solid thematic feel and transition. One thing I did not like, however, and that was the presence of clip brushes on the second deck as you enter the level (where the red armor was). I was able to get up on the shelf without rocket jumping, yet couldn't turn the corner around the box that was sticking out until later in the level. Despite this, it's a nicely-thematic level, with a semi-linear flow and good secrets. It runs smoothly throughout, and due to the low gravity, it's possible to circumvent quite a lot of the level (generating an error message, no less, in one area) with a bit of creative gymnastics. The endlevel specials sequence was nicely done, giving the player a feeling of desperation trying to escape in time.
- Command Center is the last level. It's a huge level, with spacious playing areas, fairly uncomplicated structures (to keep the running speeds smooth), simple -- if time-consuming -- puzzles, and a somewhat predictable endgame. The beta gladiators are evidently the elite guard, because I'd guess about half the monster population in here (at least, it felt that way) were the beta gladiators. Unfortunately, the endgame itself was very easy due to the amount of powerups I possessed at that point. A solid ending to an outstanding series of levels.
|
|
Munitions Dump (xdm1) by Alex Mayberry is a small, fast-paced map. Rooms are separated by short hallways,
plenty of hardware and ammo is around, and it looks like it'd be good for maybe 8-10.
|
|
|
Deadly Reckoning (xdm2) by Dan Koppel has an intricate layout with teleports strategically placed to get
you back in the action. A rather large-sized level, this one could probably hold 14-18, with plenty of "turn
the corner" frags happening.
|
|
|
Reservoir Stroggs (xdm3) by Aaron Barber is a huge, intricate level with a lot of water and piping. This one could
easily hold 20, or even more, due to small-sized open areas and lots of connecting passages.
|
|
|
The Sludge Pit (xdm4) by Rhett Baldwin is filled with slime, along with a couple of button-operated bridges
to either help you or hinder your opponents. A lot of narrow hallways with tall ceilings; be sure to look around
to find any powerups. Small, tight, and/or narrow areas are the norm here -- the grenade launcher may be your best
friend.
|
|
|
Stomping Grounds (xdm5) by Alex Mayberry and Aaron Barber is a huge, multilayered fragging arena. It's vaguely
reminiscent of q2dm1, with the curved multi-level stairways. Check out those arenas in the shots; can you imagine
having a grenade launcher with lots of grenades?
|
|
|
Hidden Agenda (xdm6) by Mal Blackwell is a level with a lot of water. The play areas are intricate and
multi-layered, with weaponry scattered liberally about. Play areas are on the smaller end of the scale, with lots
of obstacles (pillars and such) making this more of a railgun-type level than rocket launcher... unless you're
feeling lucky.
|
|
|
Xedge (xdm7) by Tim Willits and Mal Blackwell is our old favorite q2dm1... with a twist. Mission-pack-specific
weaponry and ammo have been added, as has a passageway from the hole in the wall over the rockets to the railgun room.
It's more than just a passageway; it's a new section back there. No more will you be trapped when you get the railgun.
|
Thanks to Dan Koppel, I have a list of who created which level in this pack. One interesting note about this list and that is that each level designer was responsible for an entire unit; this certainly explains the cohesion and similar architecture and "feel" through the levels in each unit, and is a way of creating levels and units that I find preferable. The list:
|
The Swamps
|
Mal Blackwell
|
|
Sewers
|
|
|
Waste Sieve
|
|
|
Outer Compound
|
Dan Koppel
|
|
Inner Compound
|
|
|
Core Reactor
|
|
|
The Warehouse
|
|
|
Intelligence Center
|
|
|
Industrial Facility
|
Alex Mayberry
|
|
Outer Base
|
|
|
Refinery
|
|
|
Water Treatment Plant
|
|
|
Badlands
|
|
|
Lower Hangars
|
Mal Blackwell
|
|
The Hangars
|
|
|
Strogg Freighter
|
|
|
Cargo Bay
|
Dan Koppel
|
|
Command Center
|
| continue... |
|
QUAKE is a registered trademark of
All original material on this page ©1996-98 by Bill J. "crash" McClendon. No part of this material may be reproduced or utilized in any form or by any means without permission in writing. Short excerpts of this material may be quoted as long as a reference to the full document is given. Commercial distribution of this material, in whole or in part, requires prior agreement with the author. Commercial distribution includes any means by which the user has to pay either for the support (e.g. book, newsletter or CD-ROM) or for the material itself. Unauthorized commercial distribution is prohibited. "TLKA" and "This Level Kicks Ass" are trademarks and the copyrighted property of Bill J. "crash" McClendon. Unauthorized use is prohibited. |